Lack of space on your desktop monitor can become a real problem – especially if you keep a lot of documents and pinned applications on it. Having dual monitors can easily solve this issue. It expands the desktop monitor space, so you can move some files to the other screen.
If you own a MacBook, you may think of using it as a second monitor for your PC instead of spending money on an actual monitor. But is this possible? Read on to find out how to use a MacBook as a second monitor for a PC.
Can a MacBook Be Used as a Monitor?
Unfortunately, you cannot connect your MacBook to your PC as a monitor. This is because of how most MacBook models were built.
Most MacBooks don’t have an existent HDMI port and input, which would be necessary to extend your Desktop space. The only model with an HDMI port is the Mac Mini.
Although certain MacBook models feature HDMI ports, they are output only. They can only send out data but will not receive any data. You could try to use adapters to connect the two devices, but this will not give you the desired result. Due to the nature of the ports, they will be unable to communicate.
What’s worse is that connecting two exit sources can cause hardware damage.
Fortunately, there is a way to work around it. A MacBook can be used as a monitor for a PC through a video capture card or special software.
How to Use MacBook as a Second Monitor for PC with Deskreen
Deskreen is an application that can help you use a certain device as an additional screen for your PC. All of this is done through Wi-Fi.
The app makes it very easy to extend your desktop space, making it more visually pleasing by moving excess files and freeing some space. Here is how Deskreen can help you use your MacBook as a second PC monitor:
1. Go to the Official Deskreen website and download the application to your PC
Downloading and installing the app should only be done on the PC, and it’s not necessary to do it on the MacBook.
Deskreen will give you an IP address that allows your MacBook to project the screen of your personal computer.
2. Get a virtual display adapter to use with Deskreen
Deskreen and similar applications use virtual display adapters, which are a special type of USB plug. They are not expensive and with these adapters, your computer will think that you’ve connected an external display to it.
Once you get it, plug your virtual display adapter into the USB port of your PC.
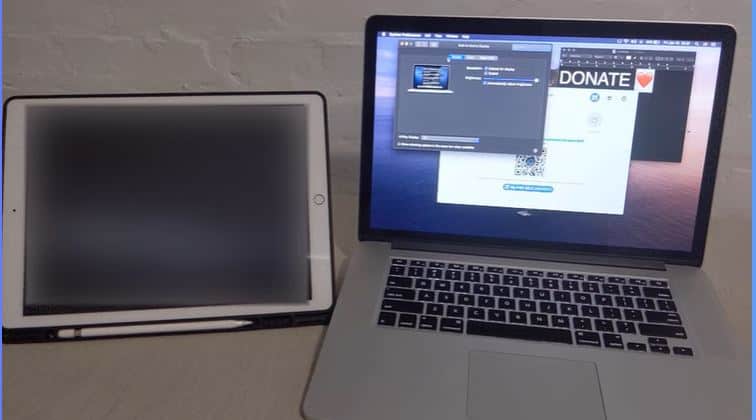
3. Turn your PC on and open the Deskreen software
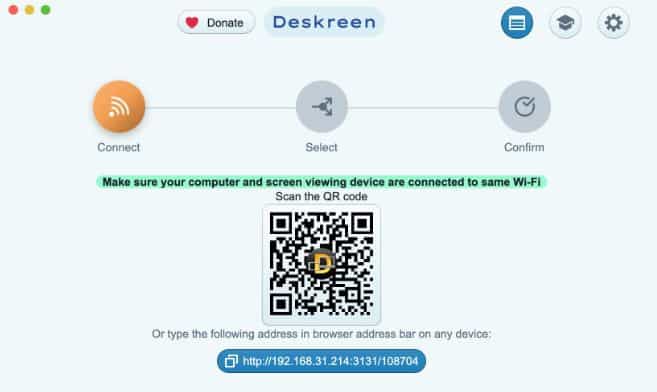
Once you’re on the app’s main page, you will see an IP address and QR code. The IP address will be useful when you want to extend to a PC, whereas the QR code is suitable when you want to extend to an iPhone or iPad.
Make sure that both your PC and MacBook are using the same Wi-Fi network before you move forward.
4. Open the web browser on your Mac and enter the IP address
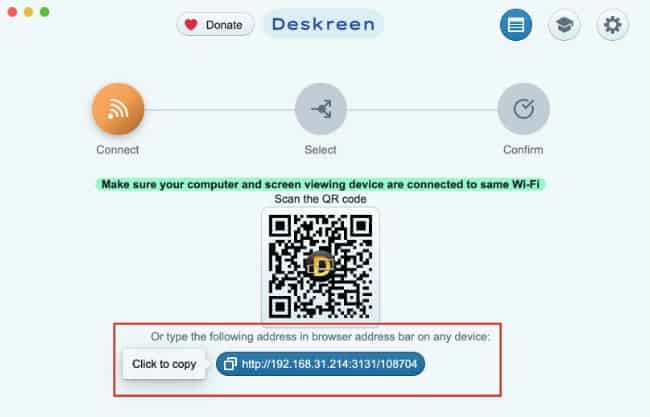
Ensure that you enter the correct IP address you see on the Deskreen homepage. After double-checking it, click Enter.
5. Go on your Deskreen application and click Allow
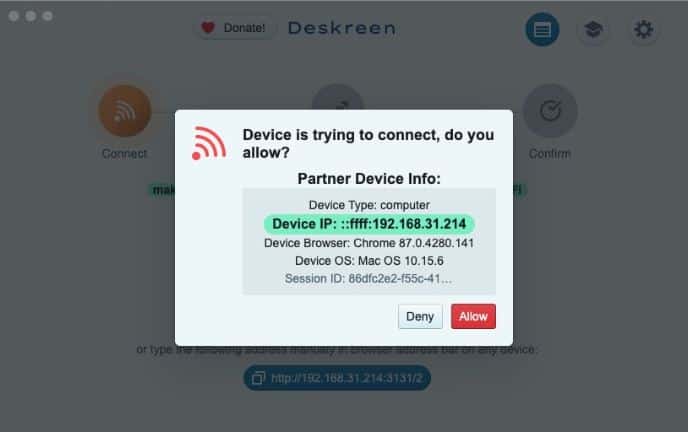
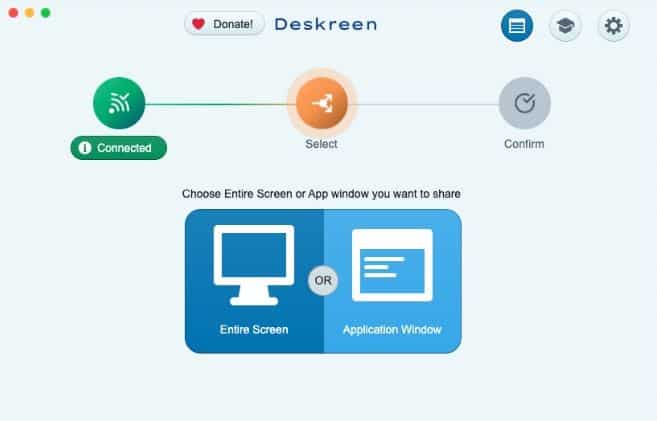
After entering the right IP address, you should see on the Deskreen app that your MacBook device is attempting to connect as a second screen. Proceed by clicking “Allow”, then select the option to share the Entire Screen.
There is also an option to share one application only to the additional screen.
6. From the list of options given by Deskreen, pick the second screen
The Deskreen software will usually present two screens after you share your entire screen. It should show you the current Desktop, as well as a version of it that is blank.
The blank option is the desktop extension that your virtual display adapter has allowed you to create. In order to make it work on the MacBook, click on the blank version.
7. Select Extend to change the projection settings of the PC
Try holding down the P and Windows keys at the same time after plugging your virtual display adapter in. Next, from the menu that shows up on your screen, select Extend.
This will make it possible for you to see the desktop across several monitors, so the image you see on the extension is not simply a copy of the Desktop.
You can now start using your PC with the MacBook as a second monitor. Try testing it to see if it works. Drag a file from your Desktop to the edge of your page until you cannot see it anymore but can see it popping up on your extra monitor.
Here is the link to the Deskreen demo.
How to Use MacBook as a Second Monitor for PC with SpaceDesk?
Space Desk is another popular software that can help you use your MacBook as a second monitor. With this program, you will need two devices. One of them will be the host, while the other one will establish a connection with the server.
In this case, when you are trying to connect your MacBook to your PC as a second monitor, you should have the PC as the host and the MacBook as the secondary device. This will establish your MacBook as your second monitor, just like you wanted.
Using Space Desk to create the connection between the devices is not that complicated. Here are the steps to follow:
- Go to the Space Desk website, download the software and install it on your PC.
- Run the server and see what the IP Address is.
- Go to your MacBook device and open http://viewer.spacedesk.net.
- Enter the host machine’s IP address. Then, simply click connect.
- Now, you should see your Windows PC’s desktop on the MacBook. This means you can start using the MacBook as your PC’s additional monitor.
You should always make sure that both the PC and MacBook are using the same Wi-Fi network. This will prevent any connection issues.
Here is a demo video!
How to Use MacBook as a Second Monitor for PC Using a Video Capture Card?
A video capture card will capture video signals, and it can help you stream from a game console or computer. It is pretty useful and similar to a small HDMI device.
This method will be suitable when you are trying to use your MacBook as a console monitor. To make it work, you’ll need a USB-C to female USB-A adapter, considering a MacBook will only have USB-C ports.
After setting the connection with the MacBook device, the console should be connected to the video capture card’s other HDMI input.
Here’s how to use a video capture card to make the MacBook operate as a second monitor:
Install the OBS to the MacBook device
Setting up the OBS is the first step you need to take care of. Install it on the MacBook, then launch the application.
At the bottom of the screen, you should see a menu. Click the plus icon you notice there. Then, choose “Video Capture Device”. Click Okay after you introduce a name.
You’ll get a list from where you have to choose your device. All the capture devices will be included there. In some cases, the capture card will not show up, in which case some drivers will have to be installed.
Then, you will have to make a few settings. For instance, you should set the YUY2 video format and the 1920 x 1080 resolution. The buffering should be on “disabled”, while its color range should be set to “partial”.
However, each capture card is different, which means you may need other settings. Play around with them until you discover the best ones for you.
After you’re done setting up everything, your OBS application should show the console’s user interface. Then, you can choose to play games or record footage while looking at the MacBook’s OBS player.
Here is a video that talks about OBS studio.
Can a MacBook be Connected to an HP Laptop?
You should be able to connect your HP laptop to a MacBook if you want to extend your monitor.
But to do so, you must use a good adaptor to convert the input connector of the monitor. This will make sure the HP laptop is compatible with the MacBook.
What Is Target Display Mode?
Target Display mode was a feature used on older MacBooks. It allowed them to be connected to newer Mac versions and serve as external monitors.
Nevertheless, Apple removed this feature from newer models. They would’ve had to add too many Thunderbolt ports to make the feature work on new MacBooks, so they got rid of it.
The Bottom Line
Using a MacBook as a secondary monitor for your PC is a great way to free some space when your desktop is cluttered. This way, you can make sure the screen looks more organized. It also offers you some extra space if you need to add more documents or apps to your desktop.
This can be achieved by using software like Deskreen or Space Desk, which connects the MacBook to your PC using a Wi-Fi connection. A video capture card will also help you use a MacBook as a second monitor for your PC.
Consider these options and choose the one that is more convenient for you.

Hello Good People! This is Pavel and Welcome to PC Delight!
I’m an Electronics Engineer by profession with a passion for Gaming & PC builds. When I came up with the idea for PC Delight, it was my goal to share & offer the very best PC building ideas to tech-loving people like myself.
Since my school days, I’ve been just addicted to gaming & PCs. That leads me to experiment with various ways around the very niche, resulting in great productivity. And I’m here to share those practical experiences. So that next time you start some experiment with your PC builds or struggle to cope with a certain game, I’m here with the solutions. With these philosophies, I started my journey in 2017 and just kept going.