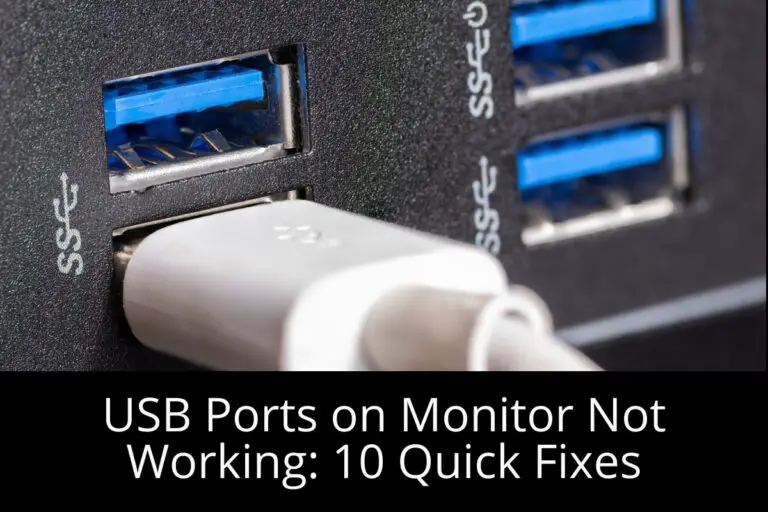
USB ports on a monitor may not work due to power issues or incorrect connections. Ensure the USB cable is connected properly.
Many users face issues with USB ports on their monitors. These ports provide convenience by allowing easy connection of peripherals like keyboards, mice, and storage devices. Problems arise when these ports stop functioning, leading to frustration. Common causes include power supply issues, incorrect connections, or outdated drivers.
Identifying the root cause can help resolve the problem effectively. Start by checking if the USB cable is securely connected between the monitor and the computer. Ensuring that the monitor’s power supply is stable is also crucial. Regularly updating drivers can prevent compatibility issues, ensuring seamless functionality of USB ports on your monitor.
Common Causes
USB ports on a monitor not working can be frustrating. Understanding the common causes can help fix the problem quickly. Let’s explore the most frequent reasons behind this issue.
Loose Connections
Loose connections are a frequent cause of USB ports not working. Ensure all cables are securely plugged in. Check both ends of the USB cable. Make sure the cable is not damaged. A damaged cable can also cause connection issues. Always use high-quality cables to avoid this problem.
Driver Issues
Driver issues can also lead to USB ports not functioning. Drivers are software that helps the computer communicate with the monitor. If the drivers are outdated or corrupted, the USB ports may stop working. Follow these steps to update your drivers:
- Open the Device Manager on your computer.
- Locate the USB ports section.
- Right-click on the USB port you want to update.
- Select “Update Driver” from the menu.
- Follow the on-screen instructions to complete the update.
Sometimes, reinstalling the drivers can solve the issue. Uninstall the current drivers and restart your computer. The system will automatically reinstall the drivers.
If updating or reinstalling drivers does not work, visit the monitor manufacturer’s website. Download the latest drivers specific to your monitor model.
Initial Checks
When your USB ports on the monitor are not working, start with initial checks. These simple steps often solve the problem. Follow the steps below to troubleshoot the issue quickly.
Verify Power Supply
First, check if the monitor is getting power. Look for the power indicator light. Ensure the power cable is plugged in securely. If the monitor has an external power adapter, inspect it for damage.
Sometimes, a loose connection can cause power issues. Try unplugging and replugging the power cable. You can also plug the monitor into a different outlet.
Inspect Cables
Next, inspect all the cables connected to the monitor. Ensure the USB cable is firmly connected. Look for any visible damage on the cables.
Try using a different USB cable to rule out cable issues. Sometimes, replacing the cable can fix the problem.
| Check | Action |
|---|---|
| Power Supply | Ensure the monitor is powered on and connected securely. |
| USB Cables | Check for damage and replace if needed. |
If these initial checks do not resolve the issue, further troubleshooting may be needed. These basic steps often help identify and fix common problems.
Restart Procedures
If your USB ports on the monitor are not working, a simple restart might solve the problem. Restarting can refresh connections and fix minor glitches. Let’s explore the restart procedures.
Reboot Monitor
Begin by turning off the monitor. Press the power button to switch it off. Wait for about 10 seconds. Now, press the power button again to turn it back on. This simple reboot can resolve many issues. Ensure that the monitor is properly connected to the power source.
Restart Computer
Restarting your computer can also help. Save any open files first. Click on the Start menu and select Restart. Wait for the computer to shut down and reboot. This process refreshes the system and can resolve USB port issues. Make sure all cables are securely connected to the monitor and the computer.
By following these easy steps, you can often fix USB port problems. If the issue persists, further troubleshooting may be needed.
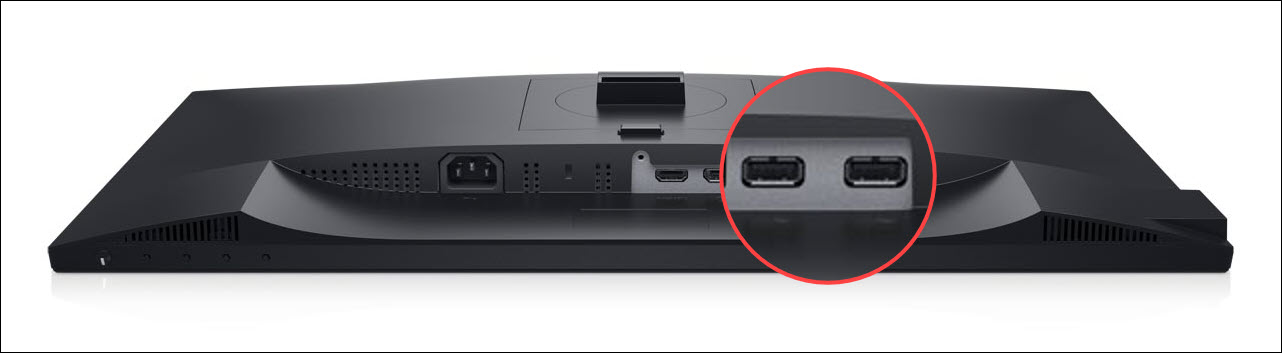
Credit: www.dell.com
Driver Updates
If your USB ports on the monitor are not working, driver updates might be the solution. Outdated or missing drivers can cause many issues. Keeping your drivers up to date ensures smooth functionality. Below, we explore how to update drivers both automatically and manually.
Automatic Updates
Automatic updates are the easiest way to keep your drivers current. Follow these steps:
- Open Device Manager on your computer.
- Locate the USB ports section.
- Right-click on the USB driver and select Update driver.
- Choose Search automatically for updated driver software.
- Let the system find and install the newest driver.
Automatic updates save time and reduce the risk of errors. Your system will handle everything for you.
Manual Installation
Manual installation gives you more control over driver updates. Follow these steps:
- Visit the monitor manufacturer’s website.
- Navigate to the Support or Downloads section.
- Find the latest driver for your monitor model.
- Download the driver file to your computer.
- Open Device Manager and locate the USB ports section.
- Right-click on the USB driver and select Update driver.
- Choose Browse my computer for driver software.
- Select the downloaded driver file and follow the prompts.
Manual installation might take more time but ensures you get the exact driver you need.
| Method | Pros | Cons |
|---|---|---|
| Automatic Updates |
|
|
| Manual Installation |
|
|
Updating your drivers, whether automatically or manually, can resolve many USB port issues. Choose the method that best fits your needs.
Usb Port Testing
Testing your USB ports is crucial when they stop working. This process helps identify the root cause of the problem. Follow these steps to test your USB ports effectively.
Check With Different Devices
Start by connecting various devices to the USB port. Use devices like USB flash drives, keyboards, or mice. This helps determine if the issue lies with the port or the device.
- Connect a USB flash drive to the port.
- Check if the drive’s light turns on.
- Try a keyboard and see if it powers up.
- Test with a mouse and observe if it responds.
If none of these devices work, the port may be faulty. If some devices work, the issue could be specific to certain devices.
Use Different Ports
Switch to another USB port on the monitor. This step helps identify if only one port is faulty or all are affected.
| Port Type | Test Result |
|---|---|
| USB 2.0 | Working |
| USB 3.0 | Not Working |
Note your findings in a table for clarity. If one port works, use it as a temporary solution. If all ports fail, further investigation is needed.
Software Conflicts
Sometimes, USB ports on your monitor may not work due to software conflicts. These conflicts can happen if different software on your computer interferes with each other. Fixing these issues can help your USB ports function properly again.
Disable Conflicting Software
Conflicting software can stop USB ports from working. To resolve this, disable unnecessary software.
- Open the Task Manager by pressing
Ctrl + Shift + Esc. - Go to the Startup tab.
- Identify software you don’t need to start with your computer.
- Right-click on the software and select Disable.
This process frees up resources and may fix the USB port issue. Ensure to only disable software you recognize and don’t need immediately.
Update Operating System
An outdated operating system might cause USB ports to malfunction. Updating your OS can resolve these issues.
- Go to Settings on your computer.
- Select Update & Security.
- Click on Check for updates.
- If updates are available, follow the on-screen instructions to install them.
Updating your OS ensures compatibility and can fix many issues, including non-working USB ports.
Bios Settings
If your USB ports on the monitor are not working, checking the BIOS settings is essential. The BIOS (Basic Input/Output System) controls the hardware settings on your computer. Sometimes, USB ports may be disabled in BIOS, causing them not to work. Let’s explore how to check and enable USB ports in the BIOS.
Access Bios Menu
To access the BIOS menu, restart your computer and press the appropriate key. This key varies by manufacturer but is usually F2, Delete, or Esc. Watch for a prompt on the screen during startup that tells you which key to press.
Once in the BIOS menu, use the arrow keys to navigate. Look for a section labeled Advanced or Integrated Peripherals. This is where you’ll find USB settings.
Enable Usb Ports
In the USB settings section, ensure all USB ports are enabled. You may see options like USB Configuration or USB Controllers. Make sure these options are set to Enabled.
Use the arrow keys to highlight each option, then press Enter to change the setting. After enabling the USB ports, save the changes and exit the BIOS. This is usually done by pressing F10 and selecting Yes to confirm.
Here’s a quick summary in a table format for your reference:
| Step | Action |
|---|---|
| 1 | Restart your computer |
| 2 | Press the BIOS key (F2, Delete, Esc) |
| 3 | Navigate to Advanced or Integrated Peripherals |
| 4 | Enable USB Configuration or USB Controllers |
| 5 | Save changes and exit (F10) |
By following these steps, you can ensure the USB ports are enabled in the BIOS, potentially resolving the issue of non-working USB ports on your monitor.
Port Cleaning
Cleaning your USB ports on your monitor can solve many issues. Dust and debris can block connections and cause problems. Follow these steps to clean your USB ports effectively.
Use Compressed Air
Compressed air is a safe way to clean USB ports. Hold the can upright to avoid liquid spray. Insert the nozzle into the port and give short bursts. This will blow out dust and debris. Repeat if necessary to ensure the port is clear.
Inspect For Damage
After cleaning, check the USB port for any visible damage. Look for bent pins or other signs of wear. Use a flashlight if needed to see inside the port. If you find damage, the port may need professional repair.
External Hubs
External hubs can be a lifesaver when your monitor’s USB ports stop working. These hubs expand your USB connectivity, giving your devices more room to connect. They are simple to use and can solve many USB port issues. Let’s dive into how external hubs can help.
Connect Via Hub
Connecting your devices through an external USB hub can be very effective. Follow these steps to connect via a hub:
- Plug the external hub into a working USB port on your computer.
- Connect your devices to the ports on the hub.
- Check if your devices are now recognized by the computer.
Using a hub can bypass faulty monitor USB ports. This makes your setup more reliable. Ensure your hub is powered if it supports power input. This can help with powering multiple devices at once.
Test Hub Functionality
It’s important to test the hub functionality to ensure it works properly. Here’s how to test your hub:
- Connect a device to the hub and see if it works.
- Try another device to confirm the hub’s functionality.
- Check if the hub’s LED lights (if any) are on.
If the hub fails to work, try plugging it into a different USB port. If it still doesn’t work, the hub might be faulty. In such cases, consider replacing the hub.
An external hub can be a great solution when dealing with non-working monitor USB ports. Always ensure your hub is in good working condition. This helps maintain a smooth and functional setup.
Credit: www.reddit.com
Professional Help
When your USB ports on the monitor stop working, it can be frustrating. Sometimes, you might need professional help to fix the issue. This section will guide you on when to seek help and how to choose a technician.
When To Seek Help
Not all USB port issues need a technician. Try these steps first:
- Check if the cables are connected correctly.
- Restart your computer and monitor.
- Update your drivers and software.
If these steps don’t work, it might be time to seek professional help. Problems like hardware failure or complex software issues require expert attention.
Choosing A Technician
Choosing the right technician is important. Here are some tips:
| Criteria | Details |
|---|---|
| Experience | Look for technicians with experience in monitor repairs. |
| Certifications | Check if they have relevant certifications. |
| Reviews | Read customer reviews and ratings online. |
| Cost | Compare prices to find the best value. |
Follow these steps to find a reliable technician. This ensures your USB port issues are fixed efficiently and professionally.
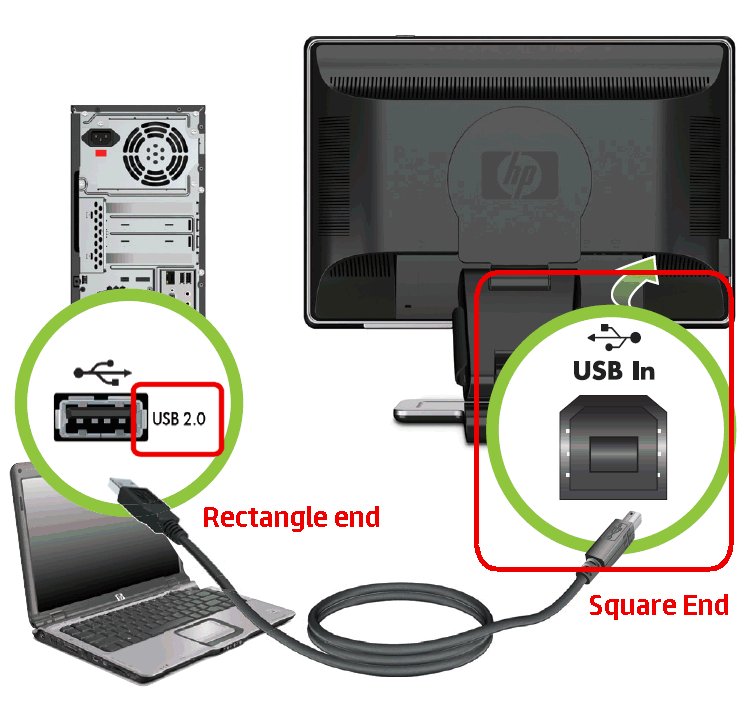
Credit: h30434.www3.hp.com
Frequently Asked Questions
How Do I Get My Usb Ports To Work On My Monitor?
To get USB ports working on your monitor, connect the monitor’s USB upstream port to your computer. Ensure drivers are installed.
Why Don’t My Usb Ports Work On My Dell Monitor?
Your USB ports on your Dell monitor may not work due to outdated drivers, faulty cables, or disabled USB ports in the monitor settings. Ensure all connections are secure and update drivers.
How Do I Fix My Usb Ports Cannot Be Detected?
To fix undetected USB ports, restart your computer. Update USB drivers via Device Manager. Check power management settings. Try different USB ports or cables. Use a USB hub.
Conclusion
Troubleshooting USB ports on your monitor can be straightforward. Follow the steps mentioned for quick fixes. Ensure connections are secure and drivers updated. If issues persist, professional help may be needed. Keeping your monitor’s USB ports functional enhances productivity and connectivity.
Don’t let minor technical glitches disrupt your workflow.

Hello Good People! This is Pavel and Welcome to PC Delight!
I’m an Electronics Engineer by profession with a passion for Gaming & PC builds. When I came up with the idea for PC Delight, it was my goal to share & offer the very best PC building ideas to tech-loving people like myself.
Since my school days, I’ve been just addicted to gaming & PCs. That leads me to experiment with various ways around the very niche, resulting in great productivity. And I’m here to share those practical experiences. So that next time you start some experiment with your PC builds or struggle to cope with a certain game, I’m here with the solutions. With these philosophies, I started my journey in 2017 and just kept going.