Ensure the USB-C cable is securely connected and check for any driver updates. Restart the monitor and your PC.
A USB-C monitor not being detected on Windows 11 can be frustrating. This issue often stems from simple connection problems or outdated drivers. Ensuring that your USB-C cable is properly connected to both the monitor and your PC is a crucial first step.
Additionally, checking for and installing any available driver updates can resolve detection problems. Restarting both your monitor and computer can also help in re-establishing the connection. With these steps, you can quickly troubleshoot and fix the issue, allowing you to enjoy the benefits of your USB-C monitor on Windows 11.

Credit: support.microsoft.com
Common Causes
Facing an issue with your USB-C monitor not detected in Windows 11? This problem can be frustrating. Understanding the common causes can help you quickly resolve it. Below, we explore some typical reasons behind this issue.
Connection Issues
One common cause of a USB-C monitor not being detected is connection issues. Ensure that the USB-C cable is securely connected to both the monitor and the computer. Check for any visible damage to the cable. Sometimes, using a different USB-C port can also resolve the problem.
If using an adapter, make sure it’s compatible with your device. Some adapters may not support video output. Also, try using a different adapter to rule out any faults. Ensure that the monitor is powered on and set to the correct input source.
Driver Problems
Another frequent cause is driver problems. Ensure your system’s graphics drivers are up to date. Outdated or corrupted drivers can prevent the monitor from being detected.
Here’s a quick guide to update your drivers:
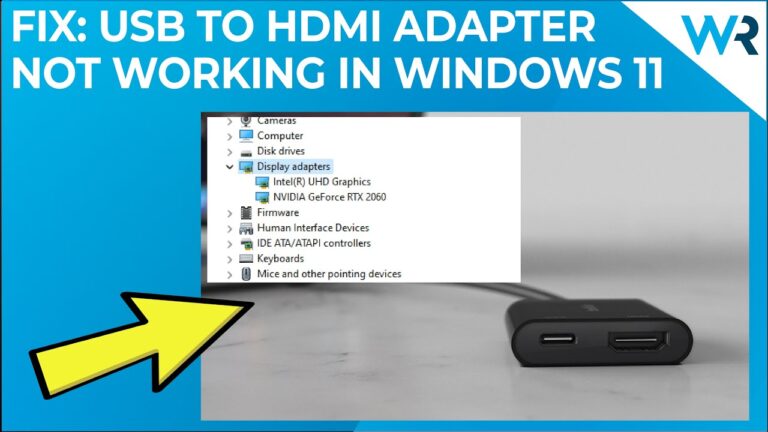
- Press Win + X and select Device Manager.
- Expand the Display Adapters section.
- Right-click your graphics card and choose Update driver.
- Select Search automatically for drivers.
Restart your computer after updating the drivers. This can often resolve detection issues. If the monitor is still not detected, consider reinstalling the graphics drivers. Visit the manufacturer’s website for the latest drivers.
In some cases, a Windows update can cause compatibility issues. Rolling back to a previous driver version might help. Always ensure to create a restore point before making significant changes to your system.

Credit: www.reddit.com
Initial Checks
Before diving deep into the technicalities, it’s essential to perform some initial checks when your USB-C monitor is not detected on Windows 11. These simple steps can often resolve the issue quickly and save you time. Let’s start with inspecting the cable and examining the ports.
Cable Inspection
First, inspect the USB-C cable connecting your monitor to your computer. A faulty cable can often be the culprit behind connection issues.
- Ensure the cable is not damaged or frayed.
- Try using a different USB-C cable.
- Check if the cable is firmly connected at both ends.
Using a high-quality, certified USB-C cable is crucial. Low-quality cables may not support data transfer or video output.
Port Examination
Next, examine the USB-C ports on both your monitor and computer. Dust or debris can sometimes block the connection.
- Inspect the ports for any visible damage.
- Clean the ports using a can of compressed air.
- Try connecting to a different USB-C port on your computer.
Ensure your device supports video output through the USB-C port. Not all USB-C ports offer video output functionality.
| Check | Details |
|---|---|
| Cable Condition | Ensure no damage or fraying. |
| Connection Firmness | Check if the cable is firmly connected. |
| Port Condition | Inspect for dust, debris, or damage. |
| Alternate Ports | Try using different USB-C ports. |
| Device Capability | Ensure the port supports video output. |
Update Drivers
Is your USB-C monitor not detected on Windows 11? This issue is common. Often, updating drivers can fix it. Below are steps to update drivers to resolve this problem.
Windows Update
First, try using Windows Update. This method is easy and automatic.
- Press Windows + I to open Settings.
- Click on Update & Security.
- Select Windows Update from the menu.
- Click Check for updates. Windows will search for updates.
- If updates are found, click Install. Wait for the process to complete.
Restart your computer after updates install. Check if your monitor is detected.
Manual Driver Installation
If Windows Update doesn’t work, try manual driver installation. This method requires downloading drivers from the manufacturer’s website.
- Go to the manufacturer’s website.
- Search for the latest driver for your monitor.
- Download the driver file to your computer.
Next, install the driver manually:
- Press Windows + X and select Device Manager.
- Find your monitor in the list. Right-click and select Update driver.
- Choose Browse my computer for drivers.
- Locate the downloaded driver file and follow the instructions.
After installation, restart your computer. Check if the monitor works.

Credit: www.reddit.com
Check Display Settings
Facing issues with your USB-C monitor not being detected on Windows 11? One crucial step is to check your display settings. Proper configuration can resolve detection problems. Below, we dive into Resolution Settings and Multiple Displays Configuration.
Resolution Settings
First, ensure your display resolution matches your monitor’s capability. Incorrect settings can cause detection issues.
- Right-click on the desktop and select Display settings.
- Scroll down to the Display resolution section.
- Choose the recommended resolution from the dropdown menu.
- Click Apply to save the changes.
Matching the resolution ensures the monitor displays correctly. Always use the recommended settings for the best results.
Multiple Displays Configuration
Next, check the configuration for multiple displays. Improper setup can prevent your USB-C monitor from being detected.
- Go to Display settings from the desktop context menu.
- Scroll down to the Multiple displays section.
- Click on Detect to search for connected monitors.
- Use the dropdown menu to select Extend these displays or Duplicate these displays.
- Click Apply to finalize the settings.
Selecting the correct display mode can solve detection problems. Ensure your cables and ports are securely connected.
Follow these steps to resolve display issues on Windows 11. Proper settings can help your USB-C monitor work seamlessly.
Firmware Updates
Keeping your monitor and computer firmware up-to-date is essential. It ensures compatibility and smooth performance. Firmware updates can fix bugs and add new features. This section covers monitor firmware and motherboard BIOS updates.
Monitor Firmware
Firmware for your monitor controls how it works. An outdated firmware may cause your USB-C monitor to go undetected in Windows 11. Follow these steps to update your monitor firmware:
- Visit the manufacturer’s website.
- Locate the support section.
- Find and download the latest firmware.
- Follow the provided instructions to install it.
If you need help, consult the user manual or the support team. Regular updates can prevent many issues. Make it a habit to check for updates often.
Motherboard Bios
The BIOS is crucial for your computer’s hardware. An outdated BIOS can cause detection issues with your USB-C monitor. To update your BIOS, follow these steps:
- Visit the motherboard manufacturer’s website.
- Navigate to the support or downloads section.
- Find your motherboard model and download the latest BIOS update.
- Follow the manufacturer’s instructions to flash the BIOS.
Updating the BIOS can be complex. Ensure you follow the instructions carefully. Incorrect updates may cause system instability.
Always back up your data before performing a BIOS update. This ensures you don’t lose important files.
Use Different Ports
Struggling with a USB-C monitor not detected on Windows 11? One effective solution is to use different ports. Sometimes, the issue lies with the specific port you’re using. Trying alternate ports can help you find a working connection.
Alternate Usb-c Ports
First, try using a different USB-C port on your device. Some devices have multiple ports. Not all ports are created equal. Some might have limitations or be faulty.
Refer to your device manual to locate all available ports. Use a port that supports video output. Ensure the port you select is clean and free of debris. Dust and dirt can interfere with connections.
Other Available Ports
If alternate USB-C ports don’t work, explore other available ports. Your monitor might have HDMI or DisplayPort options. Using these can bypass the USB-C issue entirely.
Here’s a comparison table for clarity:
| Port Type | Capability |
|---|---|
| USB-C | Power, Data, Video |
| HDMI | High-Definition Video |
| DisplayPort | High-Resolution Video |
Using different ports can solve the monitor detection problem. Always ensure your cables are in good condition. Faulty cables can also cause detection issues.
Power Cycle Devices
Sometimes, your USB-C monitor might not be detected in Windows 11. Power cycling your devices can solve this issue. Power cycling means turning off and then turning on your devices. This process can reset connections and fix detection problems.
Restart Monitor
First, turn off your monitor by pressing the power button. Wait for at least 10 seconds. This waiting time allows the monitor to fully power down. Now, turn the monitor back on. Check if your computer detects the monitor now.
Reboot Computer
Next, restart your computer. Click on the Start menu and select Restart. This step refreshes your system and can fix detection issues. Wait for your computer to reboot completely. After rebooting, check if the monitor is detected.
Test With Another Device
If your USB-C monitor is not detected in Windows 11, trying another device can help identify the problem. Connecting the monitor to a different computer or using an alternate monitor may reveal where the issue lies. Follow these steps to troubleshoot effectively.
Different Computer
Connect your USB-C monitor to a different computer. This will help determine if the issue is with your original computer. If the monitor works with another device, the problem might be with your Windows 11 settings or hardware.
To connect the monitor to another computer:
- Ensure both devices are powered off.
- Connect the USB-C cable to the monitor and the new computer.
- Turn on both devices.
- Check if the monitor is detected.
If the monitor works, the problem is likely with your original computer. Look into updating drivers or checking hardware connections on the first computer.
Alternate Monitor
Use an alternate monitor to test with your original computer. This helps to see if the problem is with the USB-C monitor itself.
To use a different monitor:
- Turn off your computer and the alternate monitor.
- Connect the alternate monitor via the USB-C port.
- Power on both devices.
- Check if the alternate monitor is detected.
If the alternate monitor works, your original USB-C monitor might be faulty. Consider having it checked or replaced.
By testing with another device, you can pinpoint whether the issue is with your computer or the USB-C monitor. Use these steps to troubleshoot and find a solution.
Reset Display Settings
If your USB-C monitor is not detected on Windows 11, resetting display settings can help. This process can resolve many common display issues. Follow these steps to reset your display settings.
Windows Display Reset
To reset your Windows display settings, follow these steps:
- Right-click on your desktop and select Display settings.
- Scroll down and click on Advanced display settings.
- Click on Display adapter properties for the display you want to reset.
- In the new window, click on the Monitor tab.
- Click on Properties and then go to the Driver tab.
- Click on Update Driver and follow the prompts.
Graphics Driver Reset
If resetting display settings does not work, try resetting the graphics driver.
Follow these steps to reset your graphics driver:
- Press Windows + X and select Device Manager.
- Expand the Display adapters section.
- Right-click on your graphics driver and select Uninstall device.
- Restart your computer.
- Windows will automatically reinstall the graphics driver.
Tables can simplify complex information. Here’s a table to summarize the reset steps:
| Action | Steps |
|---|---|
| Windows Display Reset |
|
| Graphics Driver Reset |
|
Resetting display settings and graphics drivers can solve USB-C monitor issues. Follow these steps to ensure your monitor works properly.
Seek Professional Help
If your USB-C monitor is not detected by Windows 11, sometimes the best solution is to seek professional help. There are two effective ways to get the assistance you need: contacting support or visiting a service center. Below, we will explore both options.
Contact Support
When you contact support, you can get expert advice. Follow these steps to make the most of your support call:
- Have your device model and serial number ready.
- Explain the issue clearly and concisely.
- Follow the instructions given by the support team.
Most companies offer support through phone, email, or live chat. Check the manufacturer’s website for contact details. This method can save you time and provide a quick fix.
Visit Service Center
Sometimes, visiting a service center is the best option. A professional technician can diagnose and fix your problem. Here’s how to prepare for your visit:
- Locate the nearest authorized service center.
- Bring all the necessary accessories (cables, adapters).
- Carry a backup of your data, if possible.
Visiting a service center ensures that your device gets the attention it needs. Technicians have the tools and skills to solve complex issues.
Frequently Asked Questions
Why Is My Computer Not Detecting The Monitor Through Usb-c?
Your computer may not detect the monitor through USB-C due to incompatible cables, outdated drivers, or incorrect settings. Ensure the USB-C port supports video output.
Why Is There No Usb-c Signal From My Device Windows 11?
Your device may lack the proper drivers. Update USB-C drivers or check compatibility with Windows 11.
Why Is My Usb-c Dock Not Working In Windows 11?
Your USB-C dock might not work in Windows 11 due to outdated drivers, compatibility issues, or power supply problems. Update drivers, check compatibility, and ensure adequate power.
Conclusion
Troubleshooting a USB-C monitor not detected on Windows 11 can be straightforward. Follow the steps outlined for a quick fix. Ensure your drivers are updated and check your connections. By addressing these common issues, you can enjoy a seamless monitor experience.
Stay proactive to keep your devices running smoothly.

Hello Good People! This is Pavel and Welcome to PC Delight!
I’m an Electronics Engineer by profession with a passion for Gaming & PC builds. When I came up with the idea for PC Delight, it was my goal to share & offer the very best PC building ideas to tech-loving people like myself.
Since my school days, I’ve been just addicted to gaming & PCs. That leads me to experiment with various ways around the very niche, resulting in great productivity. And I’m here to share those practical experiences. So that next time you start some experiment with your PC builds or struggle to cope with a certain game, I’m here with the solutions. With these philosophies, I started my journey in 2017 and just kept going.