Check the power and video cables to ensure they are securely connected. Verify the monitor is switched on.
Experiencing a computer monitor that isn’t displaying can be frustrating. This issue could stem from a variety of causes such as loose cables, faulty connections, or even hardware malfunctions. Ensuring that all cables are properly connected and that the monitor is powered on are the first steps in troubleshooting.
Beyond these basic checks, the problem might lie within the computer’s hardware or software settings. Addressing these potential issues systematically can help restore your monitor’s display and get your computer back to normal operation.
Initial Checks
Is your computer monitor not displaying anything? Don’t worry! Before diving deep into technical fixes, start with some initial checks. These are simple steps that can often solve the problem quickly.
Power Connections
First, ensure your monitor is properly powered. Check the power cable connection at both ends.
| Step | Description |
|---|---|
| 1 | Verify the power cable is firmly plugged into the monitor. |
| 2 | Ensure the power cable is securely connected to the wall outlet. |
| 3 | Check if the power button on the monitor is switched on. |
Look at the monitor’s power indicator light. A light indicates power is reaching the monitor. If there’s no light, try a different outlet or power cable.
Monitor Cable Inspection
Next, inspect the connection between your monitor and computer. This involves checking the video cable.
- Ensure the video cable is connected to both the monitor and computer.
- Check for any visible damage on the cable.
- Try using a different cable if possible.
Some common video cables include HDMI, DisplayPort, DVI, and VGA. Ensure you use the correct cable for your devices.
If your monitor has multiple input ports, try switching to a different port. This can help identify if a specific port is faulty.
Credit: www.reddit.com
Monitor Settings
Understanding your monitor settings can solve display issues quickly. Adjusting these settings often resolves a blank or distorted screen. Let’s dive into some critical settings.
Brightness And Contrast
Brightness and contrast control your screen’s clarity. If the brightness is too low, the screen may appear dark. Adjust the brightness slider to improve visibility.
Contrast affects the difference between light and dark areas. High contrast can make details clearer. Use the on-screen menu to adjust these settings.
Follow this simple table to remember:
| Setting | Effect |
|---|---|
| Brightness | Controls screen light |
| Contrast | Enhances detail |
Input Source Selection
Your monitor can connect to multiple devices. Ensure the correct input source is selected. Check the input source menu on your monitor. Common sources include HDMI, VGA, and DisplayPort.
To switch sources, use the monitor’s buttons or remote. Here’s a quick list:
- Press the menu button on the monitor.
- Select ‘Input Source’ from the menu.
- Choose the correct source (HDMI, VGA, etc.).
Matching the input source with the connected device is crucial. If your computer is connected via HDMI, select HDMI as the input source.
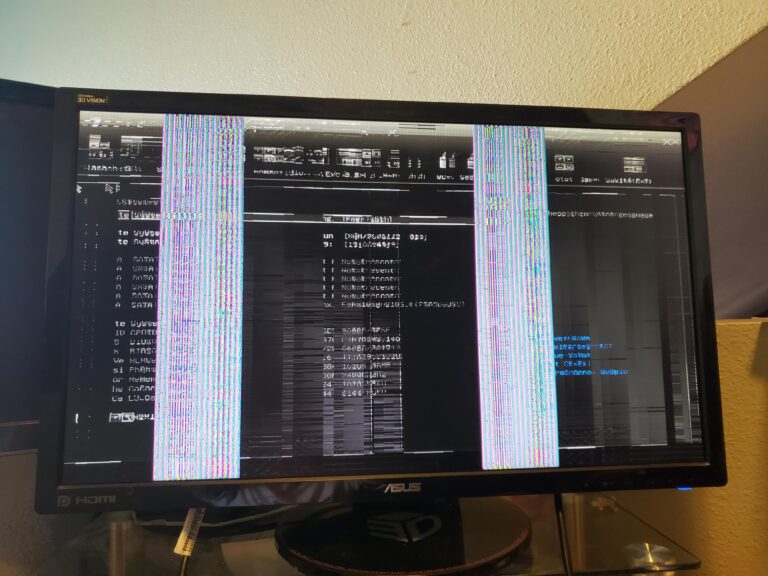
Hardware Issues
Sometimes, your computer monitor might not display anything due to hardware issues. Understanding these can help you fix the problem quickly. Below are some common hardware issues that could cause your monitor to go blank.
Loose Connections
One of the simplest issues could be loose connections. Ensure all cables are tightly connected. Check both ends of the monitor cable. If the cable is loose, your monitor won’t display anything.
| Connection Type | Action |
|---|---|
| HDMI | Ensure the HDMI cable is secure. |
| VGA | Check the VGA cable for tightness. |
| DVI | Confirm the DVI cable is firmly connected. |
Faulty Hardware
If all connections are secure, the issue might be faulty hardware. Faulty parts can prevent the monitor from displaying anything.
- Graphics Card: Ensure the graphics card is working. You can test it with another monitor.
- Monitor: Test the monitor with another computer. If it still doesn’t work, the monitor might be faulty.
- Power Supply: Make sure your power supply is delivering power properly. A faulty power supply can cause display issues.
By checking these hardware components, you can identify and fix the problem. Always start with the simplest checks like loose connections before moving to more complex hardware issues.
Software Problems
Is your computer monitor not displaying anything? Software problems can often be the cause. Let’s explore two main areas that could be causing the issue: Graphics Driver Updates and Operating System Settings.
Graphics Driver Updates
One common issue is outdated graphics drivers. These drivers help your computer communicate with the monitor.
- Open the Device Manager.
- Find the Display Adapters section.
- Right-click on your graphics card.
- Select Update Driver.
Updating your graphics driver can often solve display issues. Make sure you restart your computer after the update.
Tip: Use a tool like Driver Booster to automate updates.
Operating System Settings
Your operating system settings might be incorrect. This can cause display issues.
- Check your Display Settings.
- Right-click on the desktop.
- Select Display Settings.
- Ensure the correct monitor is selected.
Sometimes, your computer may be set to output to a different monitor. Adjust the settings to fix this.
Important: Ensure the resolution matches your monitor’s specifications.
| Step | Action |
|---|---|
| 1 | Open Device Manager |
| 2 | Update Graphics Driver |
| 3 | Check Display Settings |
| 4 | Select Correct Monitor |
External Devices
Is your computer monitor not displaying? Testing with another monitor can help. This method pinpoints whether the monitor or the computer is at fault. Let’s dive into how to test using another monitor.
Alternative Monitor Test
First, find another monitor. Connect it to your computer. Make sure the monitor is compatible. Turn on the computer and the monitor. Check if the display works. If the alternative monitor displays correctly, your original monitor might be faulty.
Cable Swap Test
Sometimes, the issue lies in the cables. Try swapping the cables between the monitors. Use the cable from the working monitor on the non-working one. Ensure the connections are secure. If the display works after swapping, the original cable might be faulty.
| Steps | Details |
|---|---|
| Step 1 | Find an alternative monitor |
| Step 2 | Connect it to your computer |
| Step 3 | Turn on both devices |
| Step 4 | Check if the display works |
| Step 5 | If it works, your original monitor may be faulty |
Swapping cables can also help identify the problem. Always keep spare cables handy. This will save time in diagnosing the issue. Proper cable management ensures smooth operation.
- Alternative Monitor Test: Helps identify if the monitor is faulty.
- Cable Swap Test: Detects if the cables are the issue.
Testing with another monitor is a quick troubleshooting step. It helps isolate the problem effectively. Follow these steps to ensure your display issues are resolved.
Testing With Another Monitor
One common issue with computer monitors not displaying is power supply issues. These problems often cause frustration but can be easily fixed. Let’s explore some key areas to check.
Power Strip And Outlet
First, ensure your monitor is connected to a working power strip or outlet. If the monitor is not receiving power, it won’t display anything. Follow these steps:
- Check if the power strip is turned on.
- Verify the outlet is functioning by plugging in another device.
- Ensure the power strip is not overloaded with other devices.
If the outlet or power strip is faulty, consider replacing it. A stable power source is crucial for your monitor’s performance.
Monitor Power Button
The monitor power button is another potential issue. This button might be turned off or malfunctioning. Here’s how to check:
- Press the power button on the monitor.
- Look for any indicator lights. These lights show if the monitor is on.
- If the monitor doesn’t turn on, try holding the power button for a few seconds.
In some cases, the power button may be broken. If so, you might need professional repair services. Always ensure the power button functions correctly for optimal use.
Power Supply Issues
BIOS and boot issues can cause your computer monitor to not display anything. These problems can occur due to incorrect BIOS settings or a failed boot process. Understanding these issues can help you fix the problem quickly.
Bios Settings
BIOS settings play a crucial role in the boot process. Sometimes, incorrect settings can prevent the monitor from displaying anything. Follow these steps to check your BIOS settings:
- Restart your computer.
- Press the BIOS key (usually F2 or Delete).
- Navigate to the Display settings.
- Ensure the primary display is set correctly.
- Save the settings and exit.
If you are unsure about the settings, you can reset BIOS to default. This option is usually available in the BIOS menu.
Safe Mode Boot
Booting into Safe Mode can help identify the issue. Safe Mode loads only the necessary drivers and can help troubleshoot the problem. Here’s how to boot into Safe Mode:
- Restart your computer.
- Press F8 before Windows starts loading.
- Select Safe Mode from the menu.
If the monitor displays in Safe Mode, there might be a driver issue. You can then update or reinstall the display drivers.
| BIOS Key | Common Brands |
|---|---|
| F2 | ASUS, Acer |
| Delete | MSI, Gigabyte |
| F10 | HP |
| ESC | Some Dell models |

Credit: answers.microsoft.com
Bios And Boot Issues
Sometimes, basic fixes don’t solve the problem of a computer monitor not displaying. In such cases, advanced troubleshooting steps are necessary. This guide will help you delve deeper into the issue using system logs and professional diagnostic tools.
System Logs
System logs contain valuable information about hardware and software events. They help identify the root cause of display issues. Follow these steps to access system logs:
- Press Win + R to open the Run dialog box.
- Type
eventvwrand press Enter. - Navigate to Windows Logs and select System.
Look for any errors or warnings related to display adapters or monitor drivers. Note down the error codes and messages for further investigation.
Professional Diagnostic Tools
Professional diagnostic tools provide deeper insights into hardware issues. These tools can run extensive tests on your system components. Some popular tools include:
- HWMonitor: Monitors hardware temperatures, voltages, and fan speeds.
- MemTest86: Tests the computer’s RAM for errors.
- GPU-Z: Provides detailed information about the graphics card.
Download and install these tools from their official websites. Run them to identify any hardware malfunctions affecting the monitor display.
| Tool | Function | Website |
|---|---|---|
| HWMonitor | Monitors hardware temperatures, voltages, and fan speeds | HWMonitor |
| MemTest86 | Tests computer’s RAM for errors | MemTest86 |
| GPU-Z | Provides detailed information about the graphics card | GPU-Z |
Using system logs and professional diagnostic tools can save time and effort. These methods provide a clearer picture of the underlying issues. Use this information to take appropriate actions and resolve the monitor display problem effectively.
Advanced Troubleshooting
Sometimes, fixing a computer monitor not displaying can be tricky. Knowing when to seek professional help is crucial. Below, we discuss key points on when to call in the experts.
Persistent Issues
If your monitor issues persist after basic troubleshooting, seek help. Basic steps include checking cables, power connections, and settings. If these don’t resolve the problem, a technician might be needed.
Here are some persistent issues that may require professional help:
- No display even after changing cables and ports
- Flickering screen despite adjusting settings
- Unusual noises or burning smells from the monitor
Warranty And Support
Check if your monitor is still under warranty. If it is, contact the manufacturer for support. Using the warranty can save you money and ensure proper repairs.
Here’s how to check and use your warranty:
- Find your purchase receipt and warranty card.
- Visit the manufacturer’s website for support details.
- Contact customer service with your product details.
Keep your warranty information handy for future reference.

Credit: answers.microsoft.com
Frequently Asked Questions
Why Is My Monitor On But No Display?
Check cable connections and ensure the monitor is on the correct input. Update graphics drivers and restart your computer.
How Do You Fix A Computer That Is On But The Screen Is Black?
Check the power connection first. Ensure all cables are securely connected. Restart the computer. Test with another monitor. Update or reinstall graphics drivers. If these steps fail, seek professional help.
Why Is My Monitor Not Detected?
Check cable connections and ensure the monitor is powered on. Update or reinstall graphics drivers. Verify the display settings.
Conclusion
Resolving a computer monitor issue can be simple. Ensure all cables are connected and check for hardware faults. Updating drivers and adjusting settings may also help. If problems persist, consider consulting a professional. Regular maintenance and timely updates can prevent future display issues, ensuring a smooth computing experience.

Hello Good People! This is Pavel and Welcome to PC Delight!
I’m an Electronics Engineer by profession with a passion for Gaming & PC builds. When I came up with the idea for PC Delight, it was my goal to share & offer the very best PC building ideas to tech-loving people like myself.
Since my school days, I’ve been just addicted to gaming & PCs. That leads me to experiment with various ways around the very niche, resulting in great productivity. And I’m here to share those practical experiences. So that next time you start some experiment with your PC builds or struggle to cope with a certain game, I’m here with the solutions. With these philosophies, I started my journey in 2017 and just kept going.